

Blinkit पर Products कैसे बेचें? Seller Registration, Fees और Growth की Complete 2026 Guide
Blinkit Seller Hub registration, required documents, product listing, warehouse shipment, fees, payouts, inventory planning और profitable growth की practical Hindi guide।
Blinkit पर selling traditional marketplace listing से अलग operating model मांगती है। Customer मिनटों में delivery expect करता है, इसलिए product approval के साथ inventory availability, warehouse replenishment, packaging compliance, accurate pricing और fast stock movement भी महत्वपूर्ण हैं। Seller के लिए opportunity बड़ी हो सकती है, लेकिन revenue तभी useful है जब हर delivered unit के बाद वास्तविक contribution बचता हो।
Current official Seller Hub के अनुसार platform self-serve onboarding, product listing, inventory management और pricing tools देता है। Businesses official portal पर register कर सकते हैं और document verification successful होने पर onboarding आगे बढ़ता है। यह guide approval, sales या profit की guarantee नहीं देती; policies, category eligibility, fees और operational requirements बदल सकती हैं। Final decision लेने से पहले अपने Seller Hub agreement और current dashboard information verify करें।
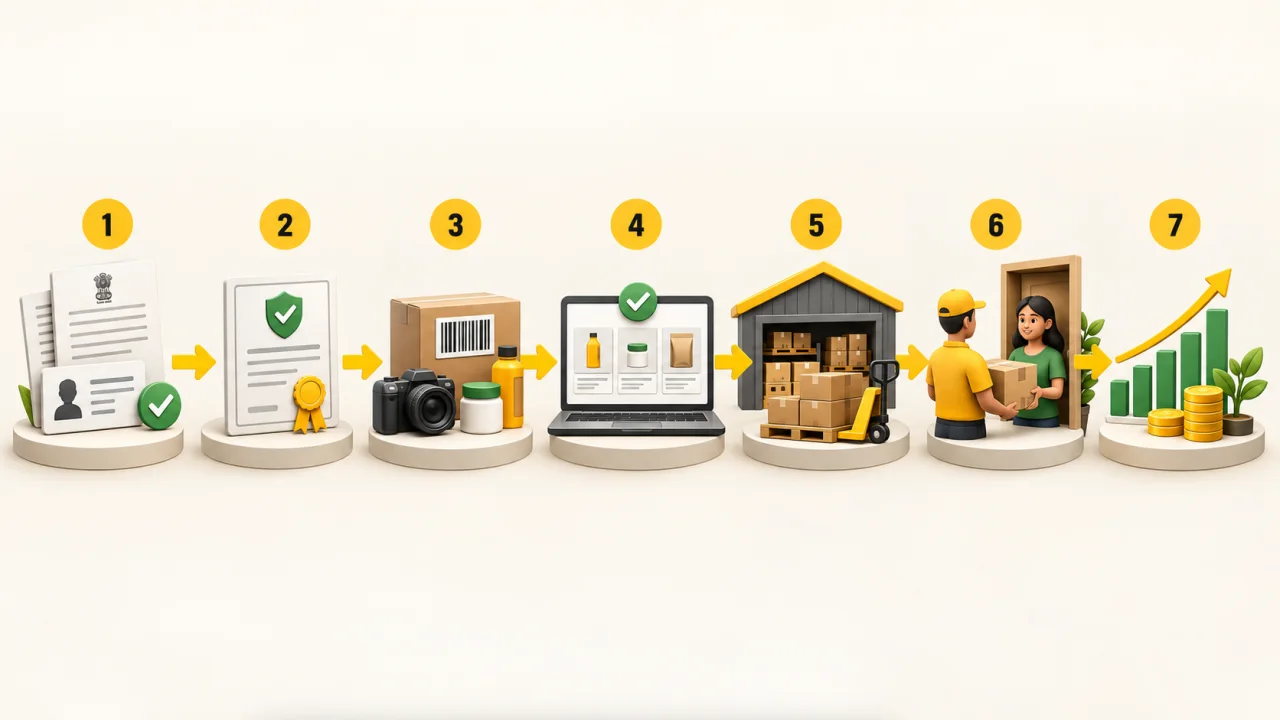
Blinkit Seller Hub क्या है?
Blinkit Seller Hub वह official platform है जहां eligible businesses registration, business verification, product listings, inventory planning, pricing, shipments, performance insights और payouts manage कर सकते हैं। Blinkit की official information के अनुसार onboarding से first sale तक process suitable cases में कम समय ले सकता है, लेकिन actual timeline document accuracy, category, product approval, shipment readiness और verification पर depend करती है।
Seller बनने के लिए केवल customer app पर account बनाना पर्याप्त नहीं है। Registration हमेशा official Blinkit Seller Hub से शुरू करें। Platform ने fake listing agents और shortcut promises से सावधान रहने को कहा है। Unknown person को OTP, banking password, UPI PIN, CVV या unauthorized payment न दें।
कौन Blinkit पर sell कर सकता है?
Official Seller Hub businesses of different sizes को invite करता है, लेकिन final eligibility product category, compliance और supply capability पर depend करती है। Common applicant profiles में brand owners, manufacturers, authorized distributors, importers और compliant D2C businesses शामिल हो सकते हैं।
| Seller type | Key proof | Operational focus |
|---|---|---|
| Brand owner | Trademark or application, brand information, manufacturer details | Product quality, pricing और inventory control |
| Manufacturer | Business, tax और applicable product licences | Consistent batches, packaging और supply capacity |
| Authorized distributor | Valid brand authorization | Territory rights और genuine inventory |
| Importer | Import and category-specific compliance documents | Indian labelling, shelf life और traceability |
| D2C business | Brand, GST, bank and applicable licences | Demand testing और repeat replenishment |
Product popular होने या दूसरे marketplace पर listed होने से automatic approval नहीं मिलता। Blinkit availability cities, categories, fulfilment network और internal checks के आधार पर decide कर सकता है।
Registration से पहले documents तैयार करें
Official Seller Hub registration FAQ के अनुसार business, brand, contact, tax, banking और shipping information ready रखनी चाहिए। Exact requirement business type और category के अनुसार बदल सकती है।
| Document or detail | Purpose | Common check |
|---|---|---|
| Business and brand details | Legal identity और brand ownership | Name, address और entity consistency |
| Trademark or application | Brand claim verification | Owner name और application status |
| Brand authorization | Distributor or reseller authority | Signed, current और product scope clear |
| Registered email and mobile | Account communication and verification | Active access और correct OTP ownership |
| GST registration | Tax and seller verification | Legal name and address match |
| Bank account details | Payout verification | Account holder, number and IFSC accuracy |
| Shipping location | Inventory dispatch planning | Serviceable origin and operational capacity |
| FSSAI licence where applicable | Food-category compliance | Validity, address and activity coverage |
| IRN credentials and digital signature where required | Invoice and documentation workflow | Authorized and functional credentials |
PAN, trade licence, Legal Metrology declarations, import records या additional product certificates भी applicable law, category और seller workflow के अनुसार मांगे जा सकते हैं। किसी generic checklist को final legal advice न मानें। अपने tax and compliance professional से business-specific requirements confirm करें।
Registration से first sale तक step-by-step process
- Official portal पर register करें: Business identity, contact details और proposed categories submit करें।
- Documents upload करें: GST, bank, brand और applicable licence information clear files में दें।
- Verification complete करें: Mismatched legal names, expired documents और unclear scans correct करें।
- Product listing बनाएं: Title, brand, category, MRP, selling price, pack size, images, barcode और mandatory label information accurately add करें।
- Products activate करें: Applicable product activation and category workflow पूरा करें।
- Inventory shipment plan करें: Seller Hub recommendation और assigned receiving location के अनुसार stock भेजें।
- Inwarding monitor करें: Accepted quantity, rejected units, shelf life, packaging और barcode issues track करें।
- Sales और replenishment चलाएं: Stockout, slow-moving inventory, pricing और payout deductions regularly review करें।
Product listing data कैसे तैयार करें?
Quick-commerce customer छोटा decision window use करता है। इसलिए listing को साफ, accurate और packaging से consistent होना चाहिए। हर SKU के लिए master data sheet बनाएं:
- Brand और exact product name
- Variant, flavour, colour या size
- Net quantity और pack count
- Printed MRP और planned selling price
- Scannable barcode linked to correct SKU
- Product dimensions और packaged weight
- Ingredients, nutrition और allergen information जहां applicable हो
- Manufacturer, marketer, importer और country-of-origin declarations
- Batch, manufacturing and expiry logic
- Front, back, side और label-focused high-resolution images
Portal data, physical packaging और invoice में MRP, pack size, barcode या product identity का mismatch inward rejection, customer complaint या compliance issue पैदा कर सकता है। Catalogue submit करने से पहले physical sample के against final audit करें।
Product images की practical checklist
- Product और packaging पूरी तरह frame में हो।
- Front label readable और unobstructed हो।
- Background clean हो और artificial claims add न हों।
- Image में दूसरे variant या wrong pack count न दिखे।
- Back-label image mandatory declarations समझने लायक हो।
- Promotional badge तभी use करें जब platform rules allow करें।
- Image file का colour physical product से materially अलग न हो।
Barcode, packaging और shelf-life control
Warehouse inwarding में barcode scan, outer packaging, quantity, product condition और remaining shelf life check हो सकते हैं। Barcode master में duplicate mapping या wrong variant सबसे costly errors में से है, क्योंकि stock physically पहुंचने के बाद correction कठिन हो सकता है।
Expiry-sensitive categories के लिए first-expiry-first-out planning रखें। Dispatch से पहले batch-wise remaining shelf life check करें और Seller Hub या purchase-order requirements से compare करें। किसी एक fixed shelf-life percentage को सभी categories पर लागू न करें; current category requirement verify करें।
Inventory Blinkit network तक कैसे पहुंचता है?
Seller products को designated network location पर भेजता है, जहां accepted inventory आगे customer-facing fulfilment network में उपलब्ध हो सकती है। Exact shipment creation, appointment, invoice, labelling और receiving process Seller Hub instructions पर depend करेगा।
| Stage | Seller control | Metric |
|---|---|---|
| Shipment planning | Recommended quantity और available stock match | Fill rate |
| Dispatch | Correct cartons, labels, invoice and appointment | On-time dispatch |
| Inwarding | Accurate SKU and damage-free units | Acceptance/rejection rate |
| Availability | Timely replenishment and city coverage | In-stock rate |
| Sell-through | Pricing, demand and promotion decisions | Units sold versus stock received |
APOB और multi-state inventory को कैसे समझें?
जब business goods को दूसरे state की warehouse location पर stock करता है, GST registration में Additional Place of Business या अन्य tax setup relevant हो सकता है। लेकिन exact treatment seller entity, stock ownership, warehouse agreement और state movement पर depend करता है। Portal instruction देखकर बिना professional review के registration changes न करें।
Target cities चुनने से पहले demand के साथ tax registration, replenishment distance, lead time, warehouse capacity और slow inventory removal cost compare करें। Pan-India ambition से पहले एक manageable cluster में unit economics validate करना safer हो सकता है।
Blinkit seller fees: कौन-कौन से charges हो सकते हैं?
Official fees page fixed universal commission percentage publish नहीं करता। Exact product-specific fees Seller Hub और commissions calculator में confirm करनी चाहिए। Category, product, price और current commercial terms के अनुसार charges बदल सकते हैं। Official overview में ये cost groups शामिल हैं:
| Charge | कब लागू हो सकता है | Seller action |
|---|---|---|
| Product ID activation fee | Product activate करते समय | Current amount और ads-wallet credit treatment verify करें |
| Inwarding fee | Inventory network में receive होने पर per unit | Small packs पर per-unit impact calculate करें |
| Storage fee | Unsold stock के daily storage पर | Slow-moving inventory और ageing monitor करें |
| Category commission | हर completed sale पर | Product-wise current rate use करें |
| Fulfilment fee | Delivered customer order पर | Price band और unit economics में include करें |
| Customer return fee | Seller-attributed return होने पर | Reason-code and packaging quality analyze करें |
| Inventory removal fee | Network से stock वापस मांगने पर | Overstock और expiry risk कम करें |
| Advertising and promotion | Optional paid visibility or funded offer | Organic margin से अलग campaign P&L रखें |
Official information के अनुसार seller registration fee नहीं है। Product ID activation fee अलग concept है और official page बताता है कि applicable amount ads wallet में sponsored ads के लिए credit होता है। हमेशा current terms check करें।
Profit calculate करने का सही तरीका
Gross sales और bank payout profit नहीं हैं। SKU-level contribution इस तरह model करें:
Net realization = Selling price − platform charges − taxes on fees − promotion contribution − returns/removal impact
Contribution = Net realization − product landed cost − packaging − warehouse dispatch cost − wastage allowance
| Illustrative item | Amount |
|---|---|
| Selling price | ₹200 |
| Total marketplace and fulfilment costs | ₹42 |
| Promotion allocation | ₹10 |
| Product landed cost | ₹105 |
| Packaging and dispatch allocation | ₹12 |
| Return/wastage reserve | ₹6 |
| Illustrative contribution | ₹25 |
यह केवल calculation method है, current Blinkit fee quote नहीं। Actual charges dashboard calculator, GST treatment और seller agreement से लें। Marketplace measurement की broader understanding के लिए AFShop की ecommerce metrics guide पढ़ें।
Pricing control और discount planning
Official Seller Hub के अनुसार seller product listing price manage कर सकता है। Pricing decision में MRP compliance, platform charges, competitor offer, inventory age, promotion funding और target contribution साथ देखें। केवल rank या volume के लिए loss-making discount चलाना sustainable नहीं है।
- Base price और temporary campaign price अलग record करें।
- Every offer के लिए start/end date और funding owner note करें।
- Price change के बाद net payout estimate recalculate करें।
- MRP, pack label और portal value consistent रखें।
- Ad spend को discount cost में छिपाने के बजाय separate measure करें।
Payout कब मिलता है?
Official fees information के अनुसार earnings applicable deductions के बाद registered bank account में automatically transfer होती हैं। Payout cycles महीने की 1st–15th और 16th–month-end periods पर आधारित हैं, और processing संबंधित cycle के बाद third working day पर बताई गई है। Bank holidays, adjustments, disputes या current policy timing affect कर सकती है। Seller Hub statement final reference होना चाहिए।
हर settlement में orders, category commission, fulfilment, inwarding/storage, ads, return adjustments, taxes और net bank credit reconcile करें। Payout आया या नहीं इतना check करना पर्याप्त नहीं; SKU profitability के लिए deduction-level reconciliation जरूरी है।
Approval delay या rejection के common reasons
- GST, PAN, bank और legal entity names का mismatch.
- Expired, unclear या wrong-category licence.
- Incomplete brand ownership or authorization proof.
- Wrong product category या insufficient product details.
- Low-quality, misleading या mismatched images.
- Missing, duplicate या unreadable barcode.
- Packaging और portal MRP/quantity mismatch.
- Insufficient remaining shelf life.
- Target location supply करने की practical capacity नहीं.
- Bank verification या digital-signing issue.
Duplicate applications बनाकर issue bypass करने के बजाय original application में exact discrepancy fix करें। Official support channel use करें और resolution का written record रखें।
Quick-commerce inventory planning
Blinkit जैसे model में stock सही city और node पर available होना चाहिए। Total inventory पर्याप्त होने के बावजूद wrong location पर पड़ा stock sales miss कर सकता है। शुरुआती phase में SKU-city matrix बनाएं:
| Signal | Meaning | Possible action |
|---|---|---|
| High views, low orders | Price, trust or listing issue | Image, price and reviews analyze करें |
| Fast sell-through, frequent stockout | Replenishment lag | Lead time and safety stock adjust करें |
| Low sell-through, high storage | Overstock or weak demand | Reorder रोकें, price/promotion test करें |
| High inward rejection | Packaging, barcode or documentation issue | Pre-dispatch QC strengthen करें |
| High seller-attributed returns | Quality or expectation mismatch | Root-cause by SKU and batch review करें |
Seller Hub growth tools कैसे use करें?
Official Seller Hub keyword analytics, commissions calculator, ads platform, shipment recommendations, tutorials और training resources जैसे tools highlight करता है। इन tools का उपयोग disciplined experiment के रूप में करें:
- Keyword demand से relevant product opportunity identify करें।
- Commission calculator से price-level margin estimate बनाएं।
- एक limited SKU group पर ads test चलाएं।
- Organic और paid sales अलग measure करें।
- Incremental contribution को ad cost से compare करें।
- Stockout होने से पहले replenishment trigger set करें।
Ads weak product economics fix नहीं करते। Listing और availability मजबूत होने के बाद paid visibility scale करें। Similar marketplace growth principles के लिए Flipkart sales growth guide और catalogue operations के लिए Meesho seller guide भी useful हैं।
First 30 days का launch plan
| Period | Focus | Deliverable |
|---|---|---|
| Days 1–5 | Document and product-data audit | Clean KYC folder and SKU master |
| Days 6–10 | Seller Hub application and verification | Submitted, traceable application |
| Days 11–15 | Catalogue, barcode and image QA | Approval-ready listings |
| Days 16–20 | Shipment and inwarding readiness | Compliant cartons, labels and invoices |
| Days 21–25 | Availability and pricing review | Live SKUs with verified margin |
| Days 26–30 | Performance baseline | Sales, stockout, fees and contribution report |
Fraud से कैसे बचें?
- Registration केवल official Seller Hub domain से शुरू करें।
- Guaranteed approval या instant listing का दावा करने वालों से बचें।
- OTP, UPI PIN, CVV और banking login share न करें।
- Payment request की beneficiary identity और official invoice verify करें।
- Unknown remote-access app install न करें।
- Reseller या consultant use करें तो authorization, scope और data access contract में define करें।
Final checklist
- Legal name सभी documents में consistent है।
- GST, bank, brand और applicable licences current हैं।
- Every SKU का barcode और physical pack match करता है।
- MRP, quantity, dimensions और images accurate हैं।
- Shelf-life and batch policy documented है।
- Warehouse dispatch and replenishment capacity realistic है।
- Exact fees commissions calculator से verify हुए हैं।
- Contribution margin discounts and ads के बाद positive है।
- Payout statement line-by-line reconcile होता है।
- Returns, rejection and stockout के root causes track होते हैं।
Final takeaway
Blinkit पर successful selling registration form से नहीं, repeatable operations से बनती है। Clean documents approval में मदद करते हैं; accurate catalogue inwarding बचाता है; सही inventory location sales बचाती है; और contribution tracking profit बचाती है।
Start small, exact product-wise fees verify करें, limited cities and SKUs पर demand validate करें और data के आधार पर replenish करें। Revenue बढ़ने से पहले supply, expiry, returns, storage और payout reconciliation को system बनाना quick-commerce growth का सबसे मजबूत foundation है।
Article at a glance
| Written by | Kabir Singh |
|---|---|
| Published | 29 Sep 2026, 11:15 AM IST |
| Reading time | 12 minutes |
| Topic | Ecommerce research and practical guidance |
Frequently Asked Questions
Blinkit seller registration कहां से करें?
Registration official Blinkit Seller Hub at seller.blinkit.com से शुरू करें। Unknown agents, fake phone numbers और guaranteed-approval claims से बचें।
Blinkit seller बनने के लिए कौन-से documents चाहिए?
Official FAQ business and brand details, trademark or application, authorization documents, registered contact details, GST, bank details, shipping location, applicable FSSAI licence, IRN credentials और digital signature जैसी information list करता है। Exact requirement category और business type पर depend करती है।
क्या Blinkit seller registration fee है?
Official fees page के अनुसार registration fee नहीं है। Product ID activation fee अलग हो सकती है और applicable amount ads wallet में sponsored ads के लिए credit होने की जानकारी दी गई है। Current dashboard amount verify करें।
Blinkit कितनी commission लेता है?
एक universal fixed rate मानना सही नहीं है। Category commission और other charges product तथा commercial terms के अनुसार बदल सकते हैं। Exact product-wise fees Seller Hub commissions calculator और seller agreement में verify करें।
Blinkit पर product price कौन तय करता है?
Official Seller Hub के अनुसार seller product listing pricing control और update कर सकता है। Price तय करते समय MRP compliance, fees, promotions, taxes और contribution margin साथ calculate करें।
Blinkit payout कब करता है?
Official information महीने के 1st–15th और 16th–month-end payout cycles बताती है, जिनकी processing cycle के बाद third working day पर होती है। Current Seller Hub statement और bank timing final reference हैं।
Food products के लिए FSSAI जरूरी है?
Food, beverage और applicable regulated categories के लिए valid FSSAI licence required हो सकता है। Licence business name, address, activity और product category cover करना चाहिए।
क्या बिना GST Blinkit पर sell कर सकते हैं?
Official Seller Hub registration requirements में GST registration शामिल है। अपने entity और supply model के exact tax obligations qualified tax professional और current portal instructions से verify करें।
Product warehouse में reject क्यों होता है?
Common reasons में wrong barcode, damaged packaging, insufficient shelf life, MRP or pack-size mismatch, wrong labels, invoice discrepancy और unauthorized product शामिल हो सकते हैं। Dispatch से पहले physical SKU audit करें।
Blinkit पर sales कैसे बढ़ाएं?
In-stock availability, accurate images, competitive but profitable pricing, keyword demand, fast replenishment और controlled ads tests पर focus करें। Gross sales के साथ contribution margin, storage, returns और stockouts भी track करें।

Kabir Singh
Marketplace Research WriterKabir studies online marketplaces, merchant signals and product-listing quality to help readers compare offers more confidently.
View author profileRead More Blogs

Meesho पर Online Selling कैसे शुरू करें? Registration, Catalog, Pricing और Growth की Complete 2026 Guide
Meesho seller registration से catalog, pricing, packing, delivery, payment, returns और growth तक का practical step-by-step Hindi playbook—नए और छोटे sellers के लिए।
5 · Read blog
Flipkart New Seller Guide: पहले 90 दिनों में Sales कैसे शुरू और Grow करें?
नए Flipkart seller के लिए first 90 days का practical Hindi roadmap। Account readiness, starter catalogue, listings, pricing, inventory, first orders, Ads, reviews, returns और weekly growth system समझें।
5 · Read blog
India के 30 Best Online Selling Platforms: Sellers के लिए Complete 2026 Guide
India में products online बेचने के लिए 30 marketplaces, niche channels, B2B networks, social commerce और own-store platforms की practical Hindi comparison।
4 · Read blog
Flipkart Conversion Funnel कैसे सुधारें? Views से Profitable Sales तक Complete Guide
Flipkart पर impressions और clicks को profitable orders में बदलने की practical Hindi guide। CTR, conversion, cancellations, returns, ad ROAS, contribution margin और repeat demand को सही क्रम में समझें।
4 · Read blog
Comments 0
No comments yet. Be the first to share a useful thought.
Leave a comment
Your email address will not be published. Comments are reviewed before appearing. Web addresses are displayed as plain text and are never clickable.